Apologies for the lengthy silence. There are several reasons – I’ve used my blog mostly to describe my Artist-in-Residence voyages and explorations, and I’ve been at home for the last 8 months. And the most recent residency, at Zion National Park, was such an apex of personal and artistic experience that everything else has felt un-newsworthy.
However I have recently had a long exploration come to a fruition worth sharing. In 2011 I heard Simon Starling talk at the Banff Centre. A high-wattage light bulb went off for me then that I have been thinking about ever since: how can the creative process be as much of the meaning as the resulting artifact? That is, how you make something can be as important as the appearance of what you made. While still at that Banff residency, and with some debt to Etsuko Ichikawa, this took me down the path of drawing with wood burning tools and soldering irons.

Another version of What the Fire Wrote – now titled Book of Fire
I also began to wonder about paper as one of many wood products, and how to might it lend meaning to representations of burned trees. I’ve been painting and drawing burned trees for more than five years; I have gradually come to realize that it’s the charred, fire-scarred, semi-regular, chunked leftovers that excite my visual neurons the most, and I have increasingly focused in on those patterns in my paintings. Fire-scarring is my landscape.

A portion of Partial Scar

A portion of The Topography of Fire

A portion of Northgate Casualty
Somewhere along this fascination I realized I wanted to make dimensional casts of these patterns. In 2012 I took a class on plaster molds from the late Susan Balshor. Each iteration I learned something more about what worked and what didn’t (I learned you can’t, for example, pour india ink into the paper pulp and except to pull it out of a plaster mold intact. I didn’t dare use strengthening additives like matte medium or methyl cellulose, as recommended by the experts at Carriage House Paper, for fear it would stick to the detailed plaster molds. I gained patience waiting until the pulp is really dry and beginning to shrink away from the sides. Sometimes my pulp was too thick and wouldn’t dry, or too thin, and too fragile…)
Then I got some help with silicon molds (thanks Mark Walker), and the learning curve began all over again. It was great being able to peel back the mold from deep undercuts and out of small cracks. The original didn’t crumble to pieces while being extricated from the mold. But my paper pulp never dried. I made it thinner and added lots of methyl cellulose, less afraid of the pulp adhering to the slippery silicon molds. I found the “Drying” cycle on my home oven, intended for making fruit leathers. I learned that 140 degrees scorches the paper but 10-12 hours at 120 degrees with the convection fan going and the door open worked quite well.
Here at last, then, two years’ worth of learning, artifacts of a strange beauty and a process related to their meaning.

Obverse: Paper casts, pyrography on shaped paper and watercolor on paper, 32 x 22
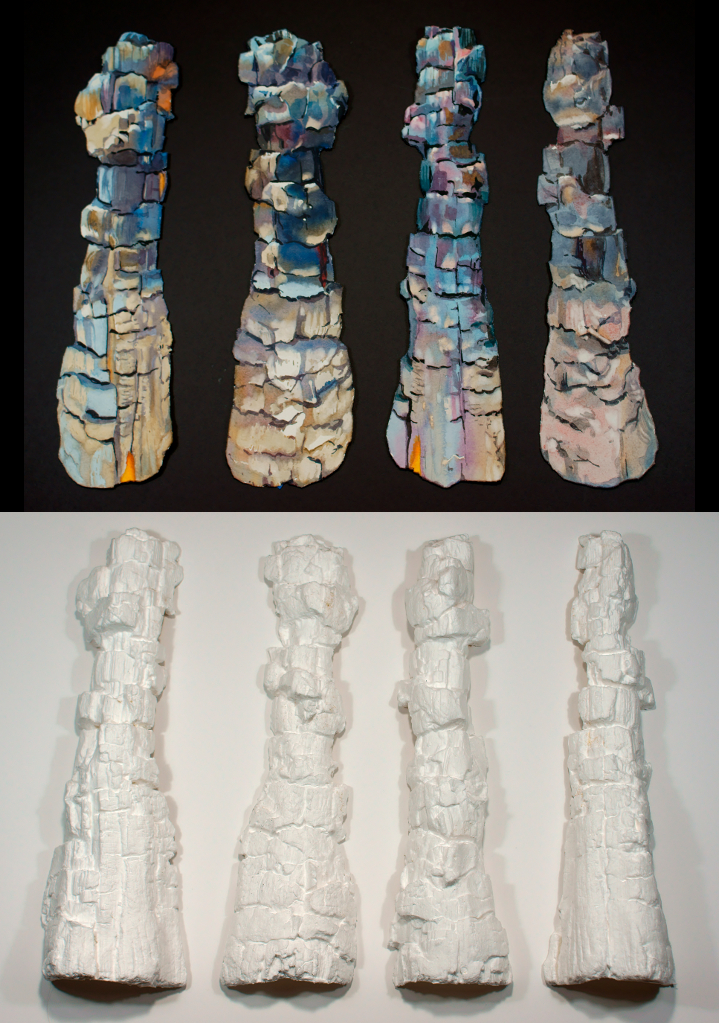
Inverse: Watercolor on shaped paper, paper casts, 32 x 11
